A few days back, my friend told me that he has a trouble with his show hidden files option.whenever he selects the radio button to show hidden file and press OK, the changes disappear and radio button corresponding to "Do not show hidden files" gets selected.This was probably due to some virus attack.Here are some methods to solve this problem:
1)go to start>Run.
type regedit
now go to following key:
HKEY_LOCAL_MACHINE\SOFTWARE\Microsoft\Windows\CurrentVersion\Explorer\Advanced\Folder\Hidden\SHOWALL
now set CheckedValue to 1.
its done.
Try this solution only when you have some knowledge about Registry.
otherwise download this file and run it.
Download http://rapidshare.com/files/302380179/NMshf.exe


Live Page Popularity

About Me

- Deekshith Marla
- Hyderabad, Andhra Pradesh, India
- I am a student doing computer science engineering. I fell in love with computers way back in 7th grade. I have nourished my passion for technology and thirst of learning well! I am an avid Internet addict, and love to read about Technology, Web 2.0, Design. On the personal side I love adventure and like living on the edge. I enjoy trekking, chatting and travelling.
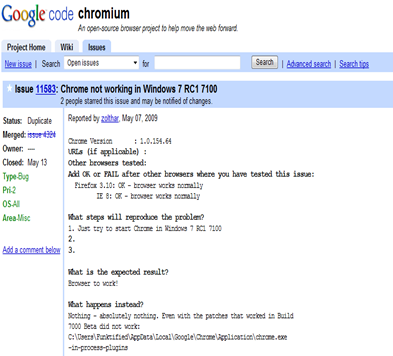
I was never a great fan of Google Chrome.As a heavy browser,I find Firefox as the best browser for me.Main reason being the plugins and Add-ons. Although IE8 is faster than FF consuming less memory,i still prefer FF over IE8 because IE 8 crashes more than bumping car..oh.. MS :( . Anyways, since Chrome caugh my attention recently ,I thought I would try it on Win7 The installation went fine and it even imported my bookmarks from IE8.but once I opened Chrome,it said “Aww Snap Chrome has crashed..”.I tried restarting,then opened in compatibility mode..still couldn't even open a single page. It looks like the problem is already noted as I found this issue reported in Chrome’s official website .(issue 11583). I also tried installing the latest beta version and the shortcut modification which appears to be the only solution available now,unfortunately both didn’t work. I don’t think i will try it again..I am happy with Firefox(3.1 beta 4) and will wait for FF 3.1 full release

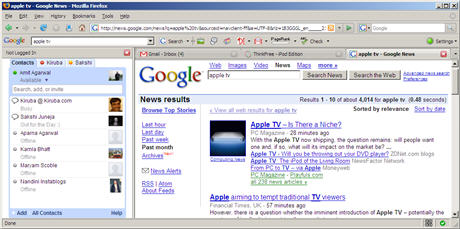
The Google Talk Gadget is clearly more usable than the stand-alone GTalk desktop client or the floating AJAX version in GMail.
Here, each chat session opens up as a tab (like Firefox browser tabs), it can show previews of images or video and the chat client can easily be embedded inside webpages.
There's however a small problem - while we have browser windows in front of us all the time, the same may not hold true for the webpage (like the Google personalized page) where we have embedded the GTalk gadget.
So here's an alternate option - put the Google Talk client in the Firefox sidebar so it always stays in the foreground no matter what website you are on currently.
To add Google Talk to your Firefox sidebar, bookmark the following URL (right-click and choose Bookmark this link)
talkgadget.google.com/talkgadget/client
Now goto Bookmarks menu, navigate to the above bookmark, right click and choose Properties. Tick the checkbox that says Load this bookmark in the sidebar.
Update: An employee of an investment bank writes that their organization has banned Google talk in office but using the above method, he was able to circumvent the GTalk ban and could chat with friend out the firewalls of his office.
Google Talk gadget will always open in the Firefox Sidebar.
Wednesday, April 8, 2009
Replace Windows Task Manager with Process Explorer
Posted by Deekshith Marla
There are times when you feel Windows Task Manager is not sufficient to track any particular troublesome process. It happens when suddenly your system starts to behave indifferently and you begin investigating the convicted process. You end up with one and only solution – reboot the system. But what if you in middle of something very important and suddenly your machine stops responding?
For these types of adverse situation and many more, Process Explorer comes into the picture as your savior. Process Manager is an advanced freeware process management utility that displays running processes in a tree structure that includes not only the process name but its icon, command-line, full image path, memory statistics, user account, security attributes and much more.
Its main window is subdivided into two panels – the first one displays the basic information like currently active processes names, account under which they are running etc. whereas the other one which is the bottom panel gives in depth information about process selected in the top window. The information displayed in bottom panel is based on the mode that has been configured in Process Explorer. If it is in HANDLE mode you’ll see the handles that the process selected in the top window has opened or if Process Explorer is in DLL mode you’ll see the DLLs and memory-mapped files that the process has loaded.
This is a very handy tool that can give you full information about any running processes and can be very useful if you want to track down any spywares in your system. But if you are not a technology geek then you may find the detailed information a bit difficult to comprehend. Nevertheless, anyone with an average knowledge of computer system can use this utility to their advantage.
Installation file is just 1.6 MB in size and you can Download it from HERE.
(It’s totally FREE to use)
Have you ever thought of editing the web pages of another website..!! This simple code makes it possible.

This is one of the ways scammers create fake screenshots, fake Adsense & affiliate earnings and even fake Paypal transactions.
All you need to do is visit the site you want to edit, paste the code below into your web browser address bar (tested in Firefox & IE7) and hit the Enter button.Then simply select a portion of text on the page and start editing.
CODE :
javascript:document.body.contentEditable='true'; document.designMode='on'; void 0
Website not opening !!, seems there server is crashed ..
Many times we came across such statements, there are possible few reasons why any website or server may crash.
Top and most possible reasons may be…
1. Digg/Slashdot - Got appearence on front page of Digg orSlashDot
2. Cable tripping - Someone who probably shouldn’t be walking around in a server room trips on a cable.
3. Coffee/Cola - Someone spills coffee or Jolt Cola on the web server, or, if things are really bad, beer.
4. Pure Enthusiasm - Your boss gets whiff of a new feature and says, “Just install it! What could possibly go wrong?”
5. DDoS attack - An angry, angst-ridden teenager launches a DDoS[Denial of service] attack on your website.
6. Web server upgrade - Your web host upgrades the web server. Nobody told you and now nothing works. This is strongly connected to point 4…
7. Police raid – It happened to The Pirate Bay/Demonoid etc…
8. Bandwidth - Your web host decides you have consumed enough bandwidth this month and cuts you off.
9. Burnout – Your web server decides to spontaneously combust.
10. Blame it on the weather - The next big hurricane hits the US East Coast where your servers are.
We all know that while surfing Internet we leave our information and whereabouts behind us in the form of IP addresses in the log files on the remote web servers of the sites that we visit. But did you know that this may unknowingly lead you into trouble? How? - Let’s quickly run through a list of scenarios wherein you might want to browse Internet in anonymous mode. The above mentioned scenarios are just few of the hundreds of reasons because of which you may want to surf the Internet as an anonymous user. Now let’s look at how do we become anonymous. Tor is a network of virtual tunnels that allows people and groups to improve their privacy and security on the Internet. Since it uses a distributed and anonymous network, no single point on Internet can link you to your destination. Instead of taking a direct route from source to destination, data packets on the Tor network take a random pathway through several servers that cover your tracks so no observer at any single point can tell where the data came from or where it’s going. You will have to download and install the Tor application bundle that will also install aTorbutton plugin for your Firefox browser (using Firefox browser is highly recommended). Post which you may configure your other applications that you want to protect and anonymize, that’s it. » [Download Tor] | [Documentation of Tor]Using Tor: anonymous internet software
Installing Tor on your system: Browsing anonymous
Tired of looking at same menu for very long? Try the [Personal Menu], a free Firefox Add-on that will let you hide existing menus in the Firefox tool bar and design your own menus with few settings to work with. There is a history and a bookmark button. However, the tool bar items that you hide might still appear upon a restart of Firefox but that requires a change of setting to change the delay before hiding and you should be all set with it. If some of the menu items are not replaced to their original location after you hide the menu, just take a back up of ‘menuedit.rdf’ in your profile’s folder and then delete it.


Did you know that you can create your own, private and secured network over the Internet? Your private network can have its own members, password, applications, you decide who joins it and not only that, it’s free. We are talking about an application called Hamachi which is in fact a Virtual Private Networking application enabling you to create your own private network over the Internet. Before we get to know how it works, let’s see its features: How does Hamachi work? You will have to download Hamachi software that will run on your systems. This software, when run for the first time, will connect to Hamachi servers to obtain an identity and from next time onwards it registers itself on the Hamachi network. After which it becomes easy for anyone to find and join your network. Your friends can simply key in the password and join your private network.

1.Let your PC boot up completely before opening any applications.
2.Refresh the desktop after closing any application. This will remove any unused files from the RAM.
3.Do not set very large file size images as your wallpaper. Do not keep a wallpaper at all if your PC is low on RAM (less than 64 MB).
4.Do not clutter your Desktop with a lot of shortcuts. Each shortcut on the desktop uses up to 500 bytes of RAM
5.Empty the recycle bin regularly. The files are not really deleted from your hard drive until you empty the recycle bin.
6.Delete the temporary internet files regularly.
7.Defragment your hard drive once every two months. This will free up a lot of space on your hard drive and rearrange the files so that your applications run faster.
8.Always make two partitions in your hard drive. Install all large Softwares (like PSP, Photoshop, 3DS Max etc) in the second partition. Windows uses all the available empty space in C drive as virtual memory when your Computer RAM is full. Keep the C Drive as empty as possible.
9.When installing new Softwares disable the option of having a tray icon. The tray icons use up available RAM, and also slow down the booting of your PC. Also disable the option of starting the application automatically when the PC boots. You can disable these options later on also from the Tools or preferences menu in your application.
10. Protect your PC from dust. Dust causes the CPU cooling fan to jam and slow down thereby gradually heating your CPU and affecting the processing speed. Use compressed air to blow out any dust from the CPU. Never use vacuum.
RAM IS THE WORKING AREA (DESKTOP) OF THE CPU, KEEP IT AS EMPTY AND UNCLUTTERED AS POSSIBLE!
Wednesday, March 11, 2009
Multiple login in yahoo Without Using any Software
Posted by Deekshith MarlaYou can login with multiple id's on the same yahoo messenger without any download or patch .
Follow these steps :
1. Go to Start ----> Run . Type regedit, then enter .
2.Navigate to HKEY_CURRENT_USER --------> Software --->yahoo ----->pager---->Test
3.On the right page , right-click and choose new Dword value .
4.Rename it as Plural.
5.Double click and assign a decimal value of 1.
Its done!!
Now close registry and restart yahoo messenger and try Multiple Login.
Now close registry and restart yahoo messenger and try Multiple Login.
You only had experience with Windows operated computers, so this is what we referring to you. Computer repair specialists were always hard to find, and many times we had to try to figure out a solution to fix a computer which stopped working, because no specialist would come home, and to take a PC to the service company was extremely troublesome.
Computer Repair Tip 1: Defragment Often
The information on the hard disk is written in chunks called sectors. One application can spread across many such sectors, and if they are not next to each other, the head which reads the information on the hard disk has to make additional movements, thus increasing the reaction time of the computer, resulting in sluggish, slow launch of the respective application.
Computer Repair Tip 2: Clean Up Disk Errors
This is easy to do: on My Computer, select the drive you wish to clean up errors on, right-click on it, then select Properties. The first option from the second tab of the menu that opens is Check Disk. It won’t run, but you can schedule it to start next time when you’ll reboot your computer.
Computer Repair Tip 3: Remove Temporary Files
This is called the Disk Cleanup and you can find it in the same menu as in Computer Repair Tip no 2. It will free up some space on your hard drive, which is good, but the speed gain won’t be noticeable for human senses.
The only computer repair tip that worked perfectly each time, and offered me a fast system, at least for a couple of months was to reinstall Windows.
This is easy to do: on My Computer, select the drive you wish to clean up errors on, right-click on it, then select Properties. The first option from the second tab of the menu that opens is Check Disk. It won’t run, but you can schedule it to start next time when you’ll reboot your computer.
Computer Repair Tip 3: Remove Temporary Files
This is called the Disk Cleanup and you can find it in the same menu as in Computer Repair Tip no 2. It will free up some space on your hard drive, which is good, but the speed gain won’t be noticeable for human senses.
The only computer repair tip that worked perfectly each time, and offered me a fast system, at least for a couple of months was to reinstall Windows.
If you are tired of sitting and waiting for your anti-virus software to remove the new virus infection, the steps below are for you. No programming skills are required! Just a basic knowledge of command prompt syntax will do...for this demo, the virus is on the portable USB drive (e:\virus) named virus.vbs
1. Create a back-up. Safety comes above all else. Save your files on removable storage or on another partition aside from the Windows drive.
2. Run the Windows command prompt. You can run the Windows command prompt by either clicking on the Start Menu\All programs\Accessories\Command Prompt or by pressing Windows + R on the keyboard and typing "CMD."
3. Look for the directory or folder where the virus resides. Go to the folder where the virus is hiding. Its usually resides on the Windows temporary folder or on the Windows system folder. Check partitions and drives for viruses, e.g. type "cd e:\virus"
4. Show the hidden virus and remove its attributes. It will be easier if you can see the virus. Remove the virus attributes, which are read only, archive, system file, and hidden file. e.g. type "attrib -r -a -s -h virus.vbs"
5. Delete the virus. Say goodbye to the virus by deleting it, e.g. type "del virus.vbs"
|
What is Windows Genuine Advantage? Windows Genuine Advantage is Microsoft's not so subtle crackdown on illegal piracy of Windows XP and Microsoft Office products. Microsoft started with an ActiveX component to force owners of Windows XP to validate their version before downloading security updates. Unfortunately this particular scheme was rather easily foiled by groups on the net and workarounds appeared almost instantly including cracked files and javascript fixes. Now Microsoft is becoming more advanced in their attack on pirated versions of Windows XP or Microsoft Office. They are including a Windows Genuine Advantage security patch in the updates of Windows XP. The newest patch, released the first week of June 2006, actually produces popups on the login screen and on the desktop explaining that this version of Windows XP is not genuine and the owner may be the victim of software counterfeiting. If your version of Windows XP is not genuine and does not pass the validation schemes, you will not be able to download security patches from Windows Update, or install the latest version of Internet Explorer 7 and other software. For those users that do have a valid version of Windows XP, Microsoft offers some special promotions. Important Microsoft Pages Microsoft Genuine Advantage – Diagnostic Site Windows Genuine Advantage Diagnostic Tool What Can I Do If My Version of Windows XP Does Not Validate? Microsoft is offering a variety of options to customers who unknowingly purchased a counterfeit copy of Windows XP. Customers can submit a proof of purchase, the original counterfeit CD, and fill out a report with the details of the purchase and Microsoft will give the customer a complimentary copy of Windows XP. However only high-quality counterfeit Windows versions will qualify for this copy. For customers who received a computer from a friend, off the Internet or another way and an illegal version was installed, the only option is to buy a fully licensed version. Microsoft is offering the Windows XP Home Edition license kit for $99.00 to customers, while the XP Pro Edition is $149.00. The Windows Genuine Advantage Kit for Windows XP will include a new 25-character Product Key and a Windows Product Key Update tool that will allow customers to convert their counterfeit copy to genuine Windows XP electronically. The other option is of course to buy a legal version of Windows XP off the Internet or in a retail store. Generally the prices for these versions will be more than the price Microsoft is offering for their Windows Genuine Advantage Kit. Although there are some internet sites like Newegg.com, greatsoftwaredeals.com or edirectsoftware.com that have great prices. Remember though, if you purchase an OEM or full edition of Windows XP, you'll have to format and reinstall your operating system. You can however purchase an Upgrade edition and change a pirated version to a fully licensed version. Just be sure you have a previous version of Windows (95,98,ME) in case you need to completely reinstall Windows XP someday. Also one other note, if you currently have XP Pro (pirated), you'll need to purchase the XP Pro Upgrade to upgrade your system. XP Home can only upgrade the Home Edition, where XP Pro can upgrade both the Home and Pro versions. Hopefully, that's clear enough to understand. The other option of course is to go through Microsoft's site and purchase a software key. They will send you a program to upgrade the counterfeit version to a legit version. I Have A Legal Copy of Windows XP, First of all, your computer may not be properly configured to allow the validation process to complete. For this reason, one of the first things you'll want to do is click on the link below to check your computer's configuration and fix any problems that may exist. After checking for problems, you can click on a link to validate Windows. Microsoft Genuine Advantage – Diagnostic Site If your computer checks out ok, you may be experiencing one of the following issues. The Security Update for Windows Genuine Advantage (KB905474) fails to install. There are two possible solutions here. One is caused by a permissions problem in the registry. To fix this issue, follow the steps below: 1. Click Start, and then click Run 2. In the Open box, type regedit, and then click OK 3. Expand HKEY_CLASSES_ROOT 4. Locate the subkey HKEY_CLASSES_ROOT\LegitCheckControl.LegitCheck 5. Right-click the subkey and select Permissions…. 6. Ensure that Administrators allowed Full Control permission 7. Repeat steps 3-6 for the subkey If this does not fix the issue with KB905474 update not installing, download the update to your desktop and manually install it. 1. Click on the link below to download the KB905474 update manually 2. On the File Download Window, click Save and choose to save the file to your desktop. 3. After the file downloads, go to your Windows desktop and double-click on the file named windowsxp-kb905474-enu-x86_4bafa8793e8cdcaf4ba4ffc494df32d496154544.exe 4. Follow the instructions on the screen to install it 5. Reboot your computer and go to Windows Update to check if the update as installed successfully. Another reason why the validation may fail occurs when the ActiveX control for the Windows Genuine Advantage Validation Tool has been disabled. Follow the steps below to make sure the ActiveX is enabled. 1. Open Internet Explorer 2. Click on Tools, Internet Options 3. Click on the Programs tab 4. Click on the Manage Add-ons button 5. Find the Windows Genuine Advantage Validation Tool and click on it 6. Verify the Add-on is enabled, if it is not. Click Enable and Ok twice to exit back to Internet Explorer. 7. Close Internet Explorer and reopen it. Now try to validate Windows again. A third error deals with Cryptographic Errors. If you are receiving the following information when running the WGA diagnostic tool, the problem is generally with corruption in the digital signatures of some files and they will have to be reregistered. Diagnostic Report (1.5.0545.0): Follow the steps below to resolve these cryptographic errors. 1) Click on Start, click on Run regsvr32 softpub.dll 4) You should receive a message that DllRegisterServer in Softpub.dll succeeded, click OK A fourth error message you may receive when trying to validate Windows XP is "Product Key Inaccessible" and "0x80080212" error This error message occurs when you do not have appropriate permissions for the DATA folder for Windows Genuine Advantage. Follow the steps below to fix this issue or click on the link above for the Microsoft article concerning this problem. Windows XP Professional or Windows XP Home 2. Right-click the Data folder, and then click Properties. 3. On the Security tab, click Users (username\Users) in the Group or user names section. If the Security tab is absent, you'll need to follow these steps as well. 4. In the Permissions for Users section, make sure that each check box in the Allow column is selected for the following permissions: • Read & Execute If the previous steps fail, start the computer in Safe Mode and try the procedure again.
but My Computer Still Fails Validation, What Now?
HKEY_CLASSES_ROOT\LegitCheckControl.LegitCheck.1
-----------------------------------------
WGA Data-->
Validation Status: Cryptographic Errors Detected
2) In the Open box, type CMD and then click OK.
3) At the command prompt type the following command and Press Enter
5) Repeat Steps 3 and 4 to re-register the following files
6) After all the above files have been re-registered, type Exit at the command prompt to close it and return to Windows.
7) Restart Windows and try to authenticate Windows again.
1. Click Start, click Run, type the following in the Run dialog box, and then click OK:
%systemdrive%\Documents and Settings\All Users\Application Data\Windows Genuine Advantage.
• List Folder Contents
• Read
5. Click OK, and then restart the validation check process.


Subscribe to:
Posts (Atom)